Interface Guide
The Visual Editor gives you full control over how your storefront looks — without writing any code. This page explains how to use the interface to add and arrange content visually.
The Editor Layout
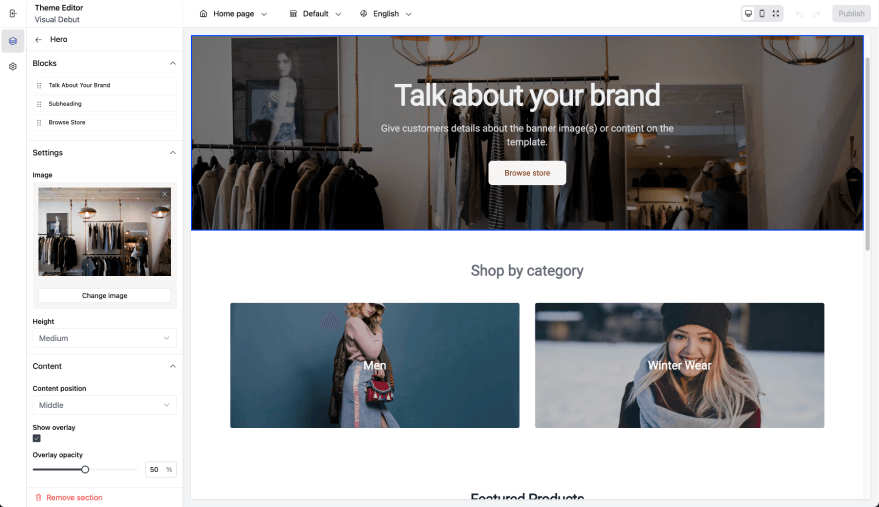
When you open the editor, you'll see three main areas:
1. Sidebar (left)
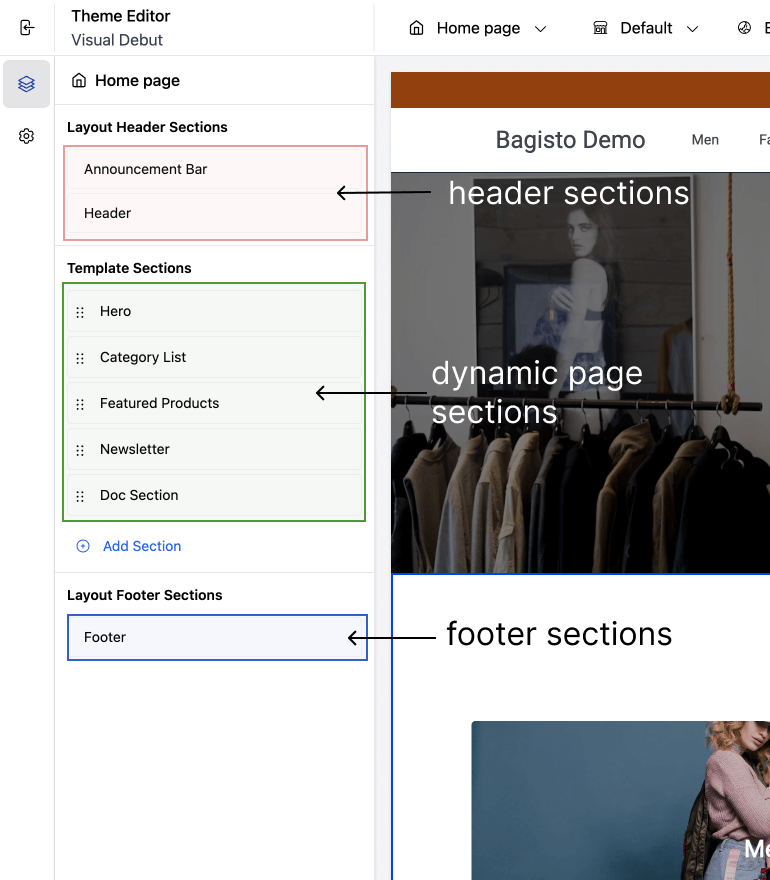
- Shows all the content on the page, broken into sections
- Sections are grouped as:
- Header & Footer: Always visible on all pages
- Main Content: Specific to the current page
- Click any section to open its settings

2. Preview Area (center)
- Shows exactly how your storefront looks
- Updates instantly as you make changes
- Click items in the preview to edit their settings in the sidebar

3. Toolbar (top)
- Shows which page you're editing (e.g. homepage, contact)
- Lets you switch language or preview screen sizes
- And a button to publish your edits

What You Can Do
Add Sections Click “Add Section” to choose from available content blocks (e.g., banner, products, newsletter).
Reorder Sections Drag and drop sections in the sidebar to change their order on the page.
Edit Section Settings Click a section to change text, images, colors, layout options, and more.
Remove Sections Click the ••• menu on a section and choose “Remove” to delete it.
Edit Blocks Inside a Section Some sections include blocks — small repeatable items like feature cards, product tiles, or categories.
Tips for Merchants
- Changes you make are saved automatically
- You can preview how your store looks on desktop, tablet, and mobile
- Not all sections are removable — headers and footers are fixed in most themes
- Each page (home, product, contact) may have different available content